Making Dry Steam
Four low-cost measures improve steam quality:
1. High Fire Limit
Every technician knows that limiting high fire is essential for combating carryover.
But the controls on IC burners disable automatic modulation when you limit fire. This increases cycling and reduces efficiency. And it can make it impossible to maintain steady low pressure, which many steam systems need.
Adding a High-Fire Limit to an IC Burner
This problem is easily solved: cut a 135-ohm variable resistor into the drive-open leg running to the modulating motor.
Do NOT mount the resistor inside the burner control cabinet, or the burner may lose its UL rating. Instead, add a box wherever it can be securely mounted, and route the modulation wiring through it. Label the box clearly.
Adjusting the High Fire Limit
Put the modulation switch to Automatic, and fire the burner. Adjust the resistor until the motor rests at the firing rate you want.
You’ll have to make a series of small adjustments to the modutrol and to your new high-fire limit, because these settings affect each other. Watch the steam pressure gauge to evaluate the effects of your adjustments.
Bring a good steam pressure gauge to use while you adjust the controls. Even better, install it permanently.
Choosing the Firing Rate
What should high-fire be limited to? If the burner was already running at limited fire, it’s reasonable to match that firing rate, no matter how low it was. Otherwise, 80% is a good starting point.
There is no downside to limiting high fire, so long as the boiler is able to make steam pressure.
2. Clean the Boiler Water
A common cause of wet steam is oily stuff in the boiler water. It gets in pretty much any time piping work is done on the system.
The oil can’t be seen, and it’s not easy to detect. Assume there’s oil in the water after you’ve done piping work, or when you have wet steam.
Boil-outs work, but they’re expensive, and require a good king valve. Simpler methods usually work as well.
If you're doing your piping work in Summer, it may be best to wait until Fall to do your cleaning. Once the heat starts, oil can take a week or two to work its way down from the radiators to the boiler.
Detergent Cleaning with Cascade
The simplest method is to use Cascade dishwasher detergent. It contains an anti-foaming agent that prevents suds, so it can be used in a boiler. However, the anti-foaming agent starts breaking down after about a week, so the boiler-water must be drained out after a few days.
Use unscented Cascade, or the entire building will smell like lemon.
As a very rough rule of thumb, use one ounce of Cascade powder per three boiler horsepower.
Getting Cascade into the Boiler, Installing Ports
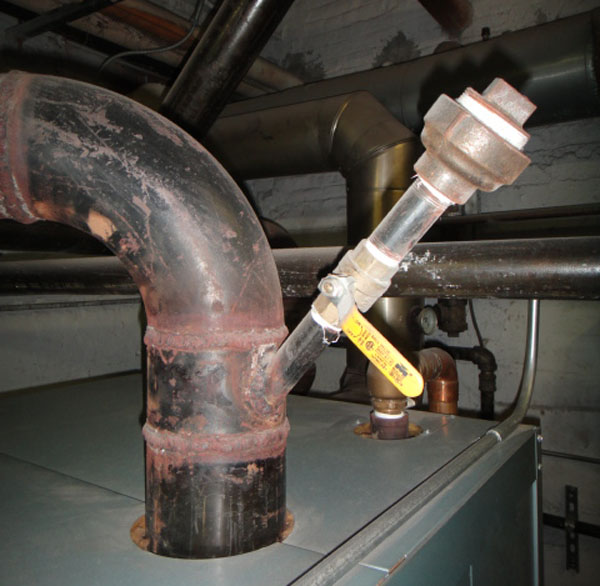
The easiest way to add Cascade is to pour it into the receiver. If there’s no receiver, add a port to the boiler. On a steel boiler, remove a plug from the side of the boiler, below the water line, and pipe a port like this:

You can use a tapping above the waterline, but to keep the Cascade powder from sitting in the elbow, pipe a street elbow into the tapping, then pipe straight up. When you add Cascade, pour some water in afterwards to clear the port.
Cast-iron boilers are harder, because they have so few tappings. Your best option may be to pour Cascade in through the safety valve tapping. Pour in water as needed to rinse away all the powder before reinstalling the safety valve.
Do not add Cascade through the control tree. The powder could sit in the piping and pigtails, possibly affecting the controls’ operation.
Include Detergent Ports in New Boilers
Pipe in a detergent port whenever you install a boiler. This makes life easier, because cleaning a new boiler can take multiple tries. The same port can be used for additives. On a new cast-iron boiler, use a Tee instead of an elbow in a header swing, and pipe the port on top.
A similar approach can be taken on steel boilers, by welding in the port directly above the steam outlet. This puts the Cascade (or additive) directly into the boiler water. A drawback (or advantage) is that the port is less accessible to building personnel.
Draining and Rinsing the Boiler After Cleanings
The Cascade must be removed from the boiler after a few days, or it will start making suds:
Steel Boilers: Drain the boiler, then re-fill and drain it again to remove all traces of detergent. Immediately fire the burner afterwards to drive the oxygen out of the fresh water. Make sure the boiler gets steam-hot.
Cast-Iron Boilers: Care has to be taken to protect cast-iron against thermal shock. Ideally, arrange for the boiler to be cold before returning to job site to remove the Cascade. If the boiler is needed for DHW, ensure that the aquastat is set as low as possible. Add water, then do a series of partial fills and draindowns to prevent shock before doing a complete draindown.
Immediately fire the burner afterwards to drive the oxygen out of the fresh water. Make sure the boiler gets steam-hot.
Skimming Boilers
Skimming is a long-established method of removing oil from boiler water. The goal is to drain the surface of heated calm water.
Getting the boiler hot (but not steaming) loosens up the oil. The loose oil gathers on the surface of the water. The water needs to be calm (not boiling), or the oil will mix back in with the water rather than laying on top of it.
To be effective, the skim tapping needs to be at the water surface, or just above it. It also needs to be big. Pipe full size from the skim tapping. You can reduce about a foot below the elbow, but not before. Otherwise you’re not piping a skim, you’re just piping a high drain.
To skim, fire the boiler until it just makes steam, then turn off the burner (the boiler will stay hot enough to make DHW). Fully open the skim drain, then open the manual feed valve. (If there is no manual feed valve, you might have to run some temporary wiring to make the condensate unit do the same thing). Adjust the feed valve as needed so that the water level is no higher than halfway up the skim tapping. Keep in mind that you’re draining the boiler water from its surface.
After a few hours, close the valves, and drain the boiler to its normal water line. Immediately fire the burner to drive the oxygen out of the fresh water. Make sure the boiler gets steam-hot.
It’s a good idea to follow a skimming with a Cascade cleaning, especially on new boilers.
A Special Word on Flux
If you use soldered copper for any piping in a steam system, use only water-soluble flux. Standard flux is oil-based and sticky. It takes forever to get it out of a boiler.
3. Anode Bars
Excessive chemical water treatment causes carryover and wet steam. Fortunately there is an alternative: anode bars, which work on the same principle as sacrificial anodes in water heaters.
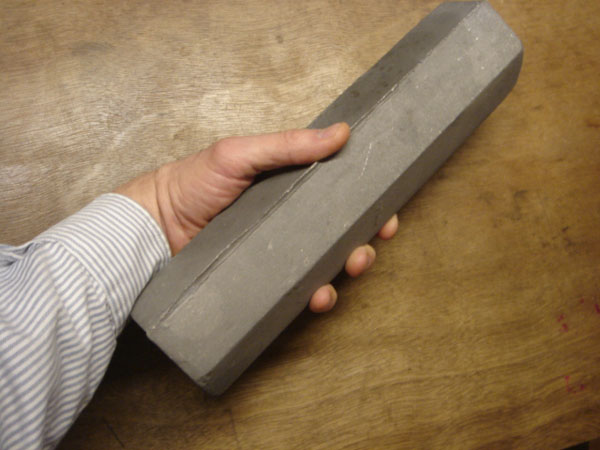
Boiler anode bars need to be replaced annually. The cost is comparable to a year of chemical water treatment.
Installing Anode Bars
The bars are installed through the manhole, and laid between the firetubes. (While you have the manhole open, make sure the steam nozzle was trimmed, or you’ll never get dry steam.) If there’s no manhole, the bars can be sawed in half lengthwise, and inserted through a hand-hole. Maximize contact between the bars and the tubes:
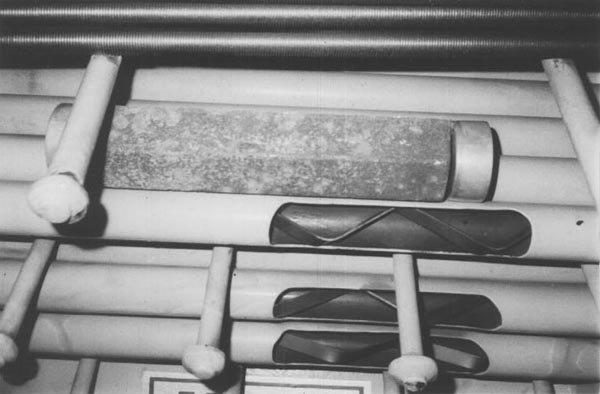
Number of Bars Needed
Large boilers need multiple bars. This table shows how many bars to install, based on the boiler horsepower:
- Up to 90 HP, install 1 bar
- 90 to 150 HP, install 2 bars
- 150 to 200 HP, install 3 bars
- For each additional 100 HP, add one bar
If the makeup water feeds into a receiver, it’s a good idea to also put a bar into the receiver, so that some oxygen can be removed from the water even before it enters the boiler.
System Must Be Tight
Anode bars probably shouldn’t be used in leaky systems, such as those with leaking buried pipes, overflowing receivers, or squirting air vents. If the daily makeup water exceeds 2% of a steam boiler's water content, the water loss should be corrected before switching to anode bars. Assume buried pipes are leaking, unless a water-meter proves otherwise.
If a system has no buried pipes, no receiver, and no squirting air vents, and the boiler has no internal leaks, the system can be assumed to be tight.
Logging Water Loss
To be sure about water loss, install a water meter into the feed line. This is often a code requirement anyway, and it can save your customer’s boiler from rotting out.
Once a water meter is in place, someone has to read it. You can download and print out this form to help the super log water use:
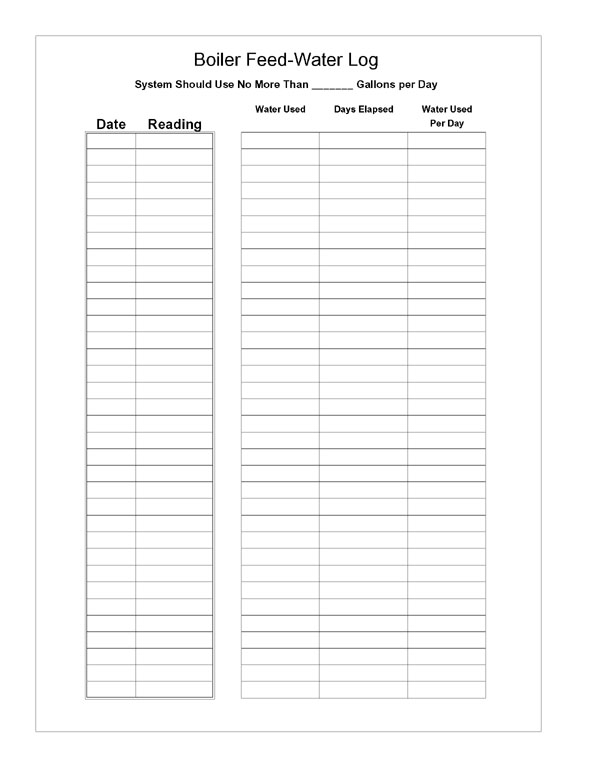
Many heat controls include a remote-reading water meter. If one is in place, ask your customer for the water use data. (This will also help remind them that they need to monitor water use.)
Chemical treatment can be used in leaky systems because it is replenished monthly. But dealing with the poor heat and hammer caused by excessive treatment is a lot more trouble than using anode bars and monitoring water use.
Flooding Receivers
If a receiver is flooding, it's because the boiler is making wet steam. Perform the full package of dry steam work: high-fire limit, detergent cleaning, lowering the waterline, and removing chemical water treatment. Run the boiler this way for a week. If the receiver stops flooding, check the logged water use, or (if there's no water meter) make sure there are no other likely areas of water loss. If you're confident the system is now tight, you can switch from water treatment to anode bars.
Cast-Iron Boilers
Anode bars cannot be used in cast-iron boilers. But cast-iron boilers in tight systems don't need anode bars or chemical water treatment. (Outside of NYC they may need softened water, however.) Unlike steel, cast-iron forms an oxide coating that arrests further corrosion. But the oxide layer can’t protect against excessive makeup-water, so it’s essential to monitor water use and check for areas of likely water loss (especially buried returns).
4. Lower the Waterline
The open space inside a boiler at the top is crucial to making dry steam. This area, called the steam chest, is where water droplets fall out of the steam, rather than being carried out into the system. The larger the steam chest, the drier the steam. And the lower the waterline, the larger the steam chest. So lowering the waterline helps you make dry steam.
If a steel boiler doesn’t have a tankless coil, the casting mark on the primary LWCO should be about ½” above top-of-tubes.
If there is a coil, set the waterline as low as it can be while still covering enough of the coil to make hot water.
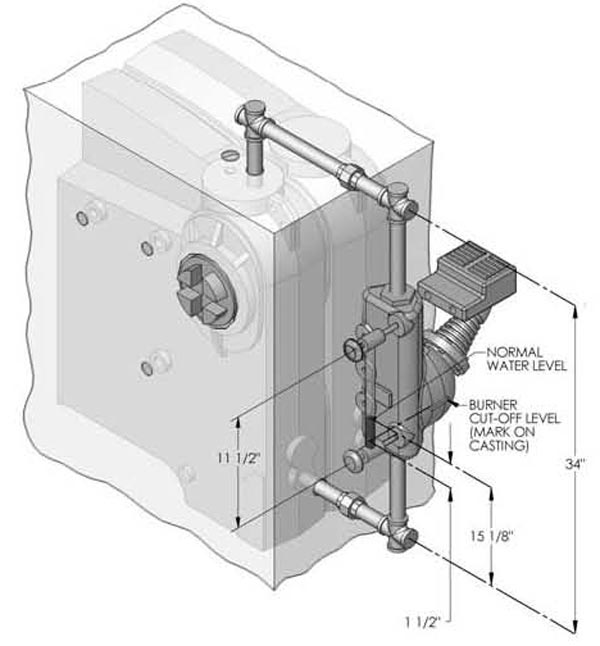
For cast-iron boilers, follow the manufacturer’s recommendations. This will often give you a much lower waterline than you might think. In the example below, the manufacturer calls for the casting mark on #157 to be 1½” above the bottom of the sight glass. This results in the largest steam chest possible, while still ensuring safety:
